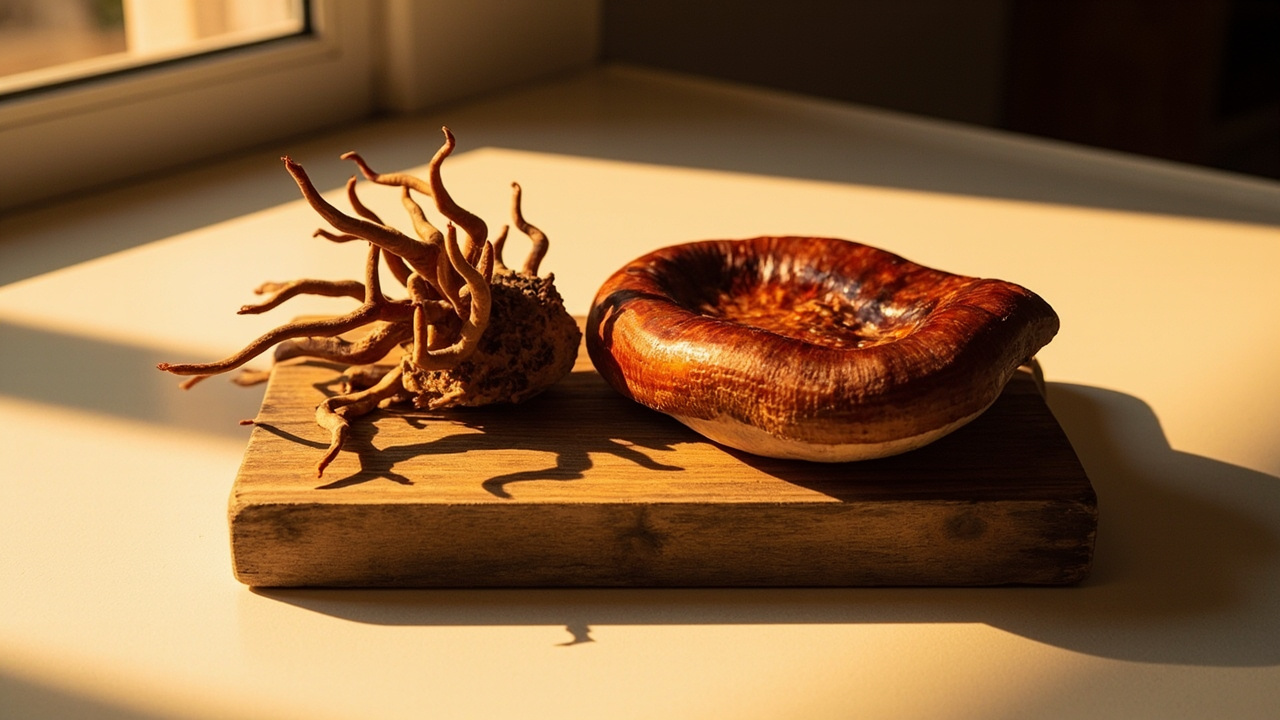
A reishi block on a kitchen counter asks for something no oyster kit ever will: six weeks of patience with almost nothing to look at. Where oyster pushes pins in days, reishi sits there, week after week, before antlers or flat lacquered brackets finally emerge from the cut face. The payoff is a mushroom you cannot buy fresh at any grocery store — a woody, bitter specimen meant for slicing, drying, and simmering into traditional tea, not for a stir-fry. This page walks through the kitchen path: open the block, match humidity to your target form, wait far longer than feels reasonable, harvest, and dry slices for brewing.
Best for: Growers who have already fruited at least one oyster or shiitake kit and want a slow-food project that ends in a traditional tea preparation rather than dinner.
Quick answer
Start with a ready-to-fruit reishi block on a kitchen counter. Keep the bag on, cut a small X, mist daily, and wait 3 to 6 weeks for antlers or conks. Reishi grows slower than oyster — antlers reach 3 to 6 inches. Harvest when growth stops, slice thin, and dry in a dehydrator at 110 degrees F. Brew the dried slices as traditional tea. Skip monotub setups — a humidity tent over one block is enough.
Why grow reishi (cultivation hobby, not medicine)
What this is and what it is NOT
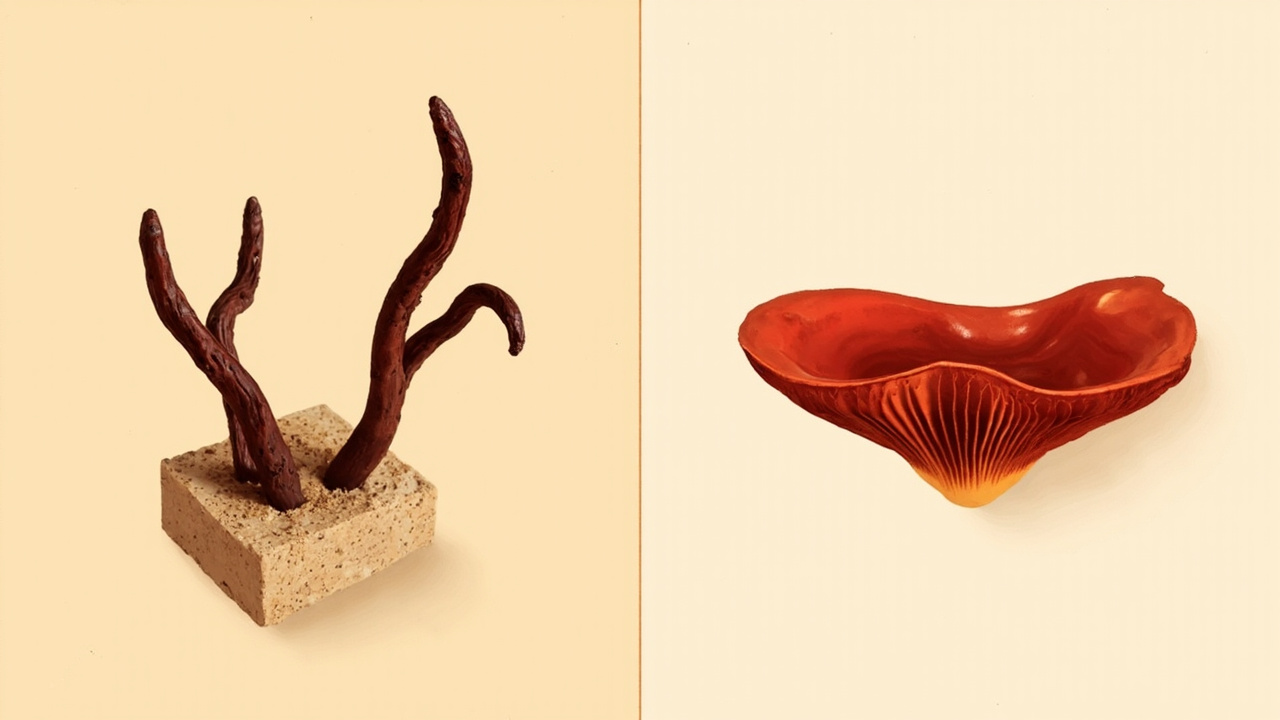
Reishi is Ganoderma lucidum (also called Ganoderma lingzhi or lingzhi mushroom) — a wood-decay bracket fungus you can grow at home on supplemented sawdust blocks. Two fruiting forms appear depending on your environment: antler (twisted, finger-like stalks) and conk (flat, lacquered bracket). East Asian cultures have brewed reishi as tea for centuries.
What reishi is NOT: it is not edible as food (too tough and bitter to chew). It is not a health supplement, a medicine, or an adaptogen. It is not psychedelic or psilocybin. This guide covers cultivation and traditional tea preparation only. We don’t make health claims or discuss supplement use. If you arrived here looking for supplement advice, this isn’t that page.
Antler vs conk — two fruiting forms
Reishi is unique among home-grow species because it produces two completely different shapes depending on environment:
- Antler form (also called daggers): twisted, finger-like stalks that curl and branch. Forms in high humidity (90% and above), low fresh air exchange, higher CO2. Many home growers prefer this form because it looks visually distinct and needs less ventilation management.
- Conk form (bracket): flat, fan-shaped bracket with a shiny lacquered red surface. Forms in normal air flow with lower CO2. This is the traditional shape seen in Chinese art and herb shops.
Same species, same genetics. The shape is determined by your fruiting environment, not the culture. You decide which form you get by how often you open the humidity tent.
Why it is worth the wait
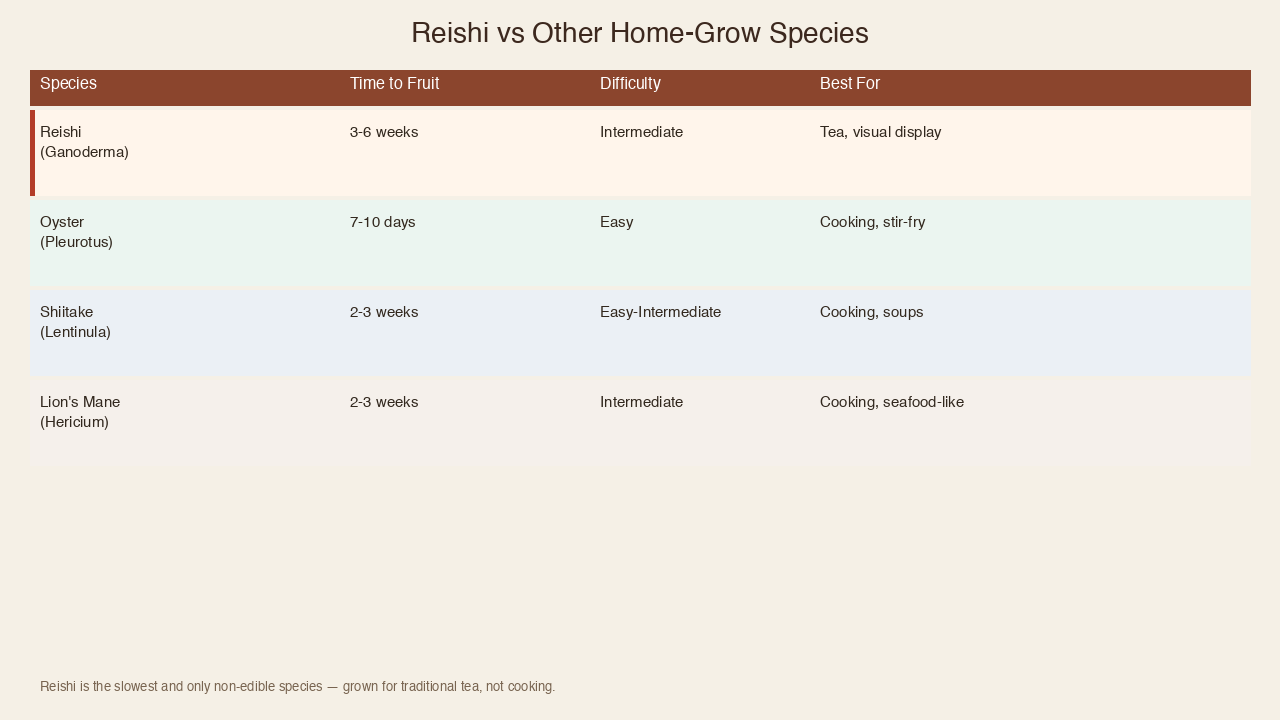
Reishi takes 3 to 6 weeks to fruit — slower than oyster (7 to 10 days), shiitake (2 to 3 weeks), or pioppino (2 to 3 weeks). But the payoff is a mushroom no other home-grow species offers: a visually stunning specimen with centuries of cultural tea tradition behind it. If you’ve already grown oyster once and want something genuinely different, reishi delivers.
Is this right for you?
Decision tree
- Branch A (new grower, want fast results) — start with oyster first. Reishi’s 3 to 6 week wait is too long for a first kit, and if something goes wrong you won’t have the experience to diagnose it.
- Branch B (returning grower, want something visually unique) — reishi now. Antlers and lacquered brackets are unlike anything else you can grow on a kitchen counter.
- Branch C (want cap-and-stem mushrooms for eating) — shiitake or pioppino. Reishi is for tea, not dinner.
- Branch D (want a seafood-like texture) — lion’s mane. Different shape, different flavor, actually edible.
Skip reishi if
- You want mushrooms to eat. Reishi is for tea only — bitter and woody, not a dinner ingredient.
- You have never grown mushrooms before. Start with oyster and come back.
- Your kitchen drops below 20 degrees C (68 degrees F) in winter without supplemental heat. Reishi wants 22 to 28 degrees C.
- You expect pins within 2 weeks. Reishi is 3 to 6 weeks minimum, often 5 before anything visible.
- You are looking for health or medicinal information. This is a cultivation guide, not a health resource.
Choose a starting route
Two paths get you to a reishi harvest. Path A is the right starting route for nearly everyone.
Path A — ready-to-fruit kit (default)
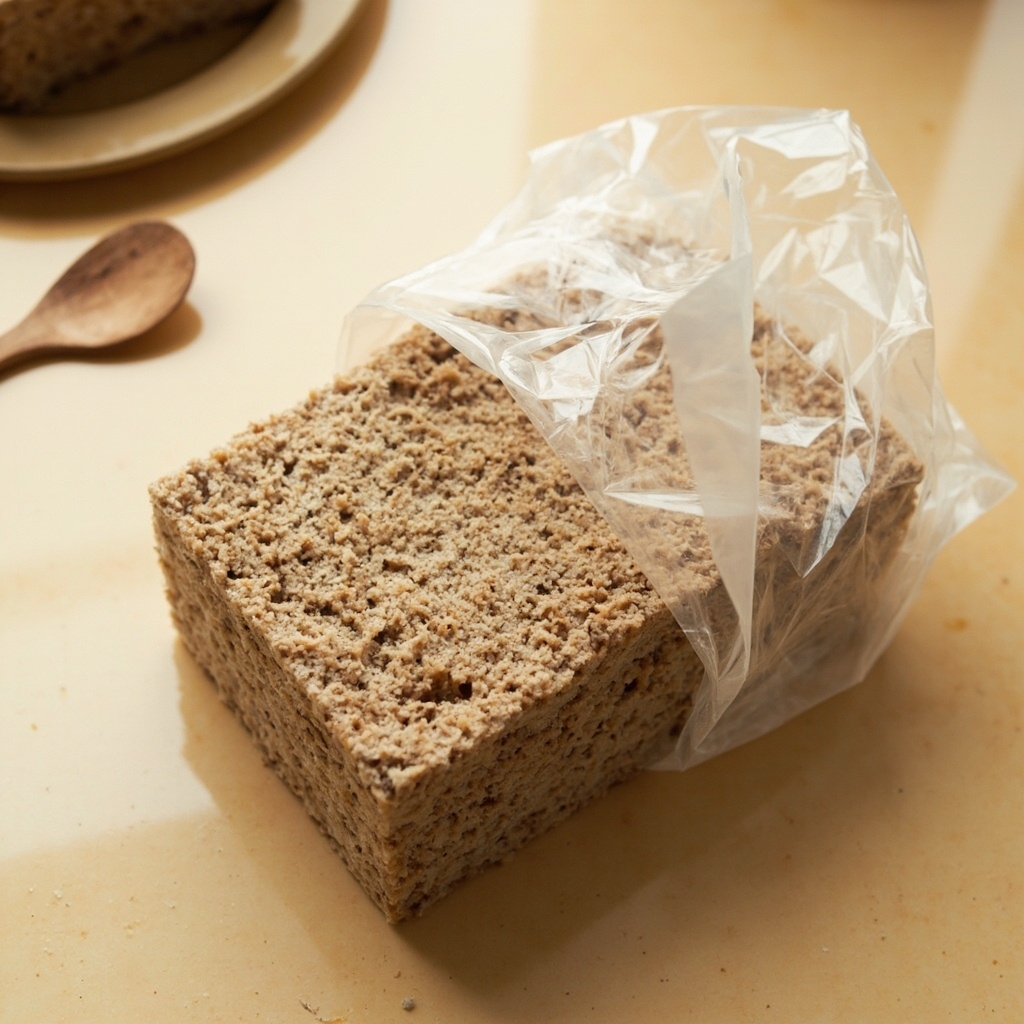
A 5 to 6 lb colonized block ships to your door. You cut an X on the face, mist daily, and wait. Cost runs $29 to $35. No sterile technique required — the block arrives fully colonized and sealed in its filter bag.
Specialty spawn vendors sell ready-to-fruit reishi blocks in this size range — look for one geared toward the high-CO2 antler form, the morphology indoor kitchen blocks actually produce. Conks want more airflow than a kitchen counter usually gives. If you’d rather shop on Amazon, the North Spore reishi log kit is the closest ready-to-go option, though it fruits on hardwood logs over a longer season instead of a cut-open block on the counter.
Path B — liquid culture and sterilized bags (advanced)
You buy a culture syringe, prepare supplemented hardwood sawdust bags, sterilize them at 15 PSI for 90 minutes, and inoculate in front of a flow hood or in a still-air box. Cost: $18 for the culture plus substrate. This path is for growers who have already done one or two kit harvests and want to scale up or try bag cultivation.
The Reishi Liquid Culture Syringe is a typical starting culture. For the full bag workflow after your first kit, see grow bags after your first kit.
Path A: From a grow kit
Open with an X-cut
Cut a 3 to 4 inch X on the front face of the bag. Peel the flaps back gently. Do NOT remove the block from the bag — the bag is your humidity tent, and it is critical for reishi, which needs 85 to 95% RH at the cut face. Removing the block is the most common way to kill a reishi kit.
If this is your first kit of any kind, start with your first grow kit walkthrough before you cut anything.
Mist, don’t drown
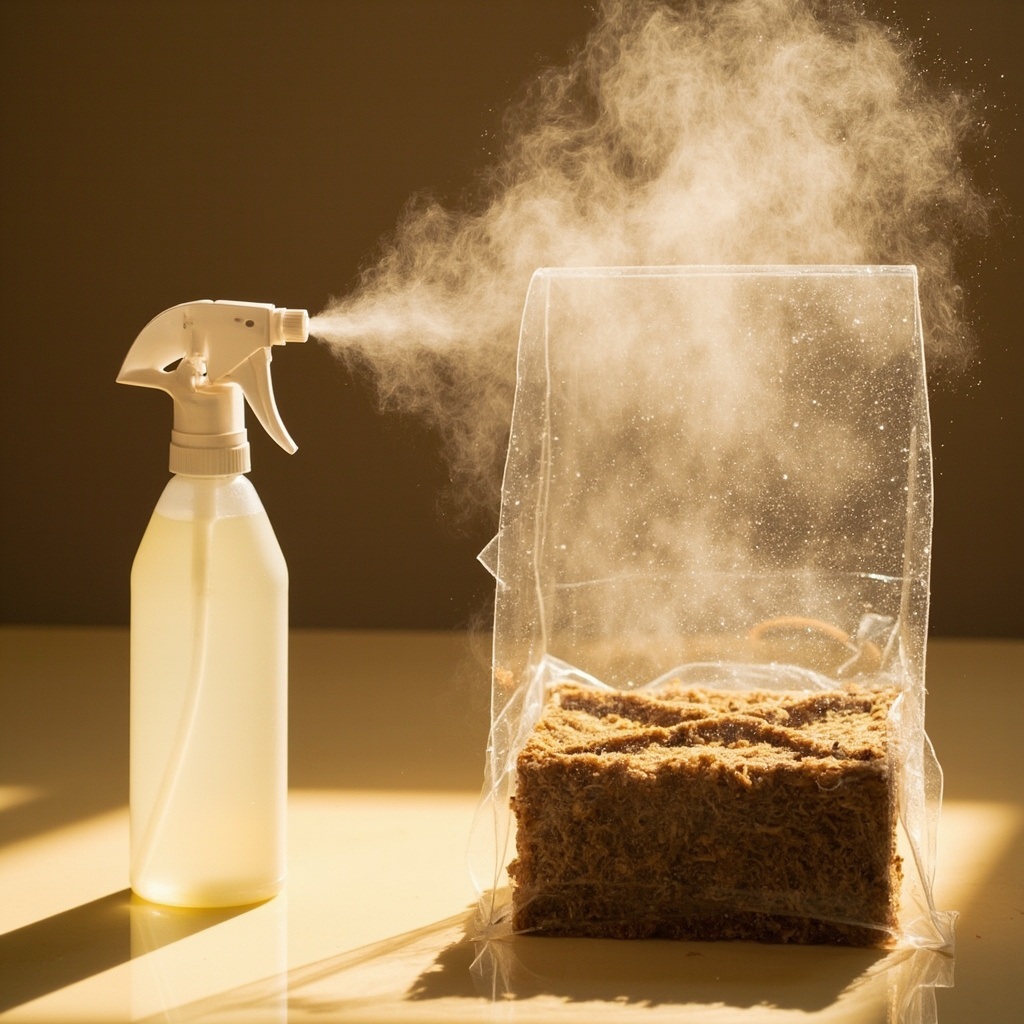
Two to three pumps of fine mist per day on the cut face. Reishi needs consistent surface moisture — drying out is the number one reason kits fail to pin. Use a continuous fine-mist bottle that produces a cloud, not a stream. You want the cut face to look dewy, not pooled.
Wait for antlers or conks (3 to 6 weeks)
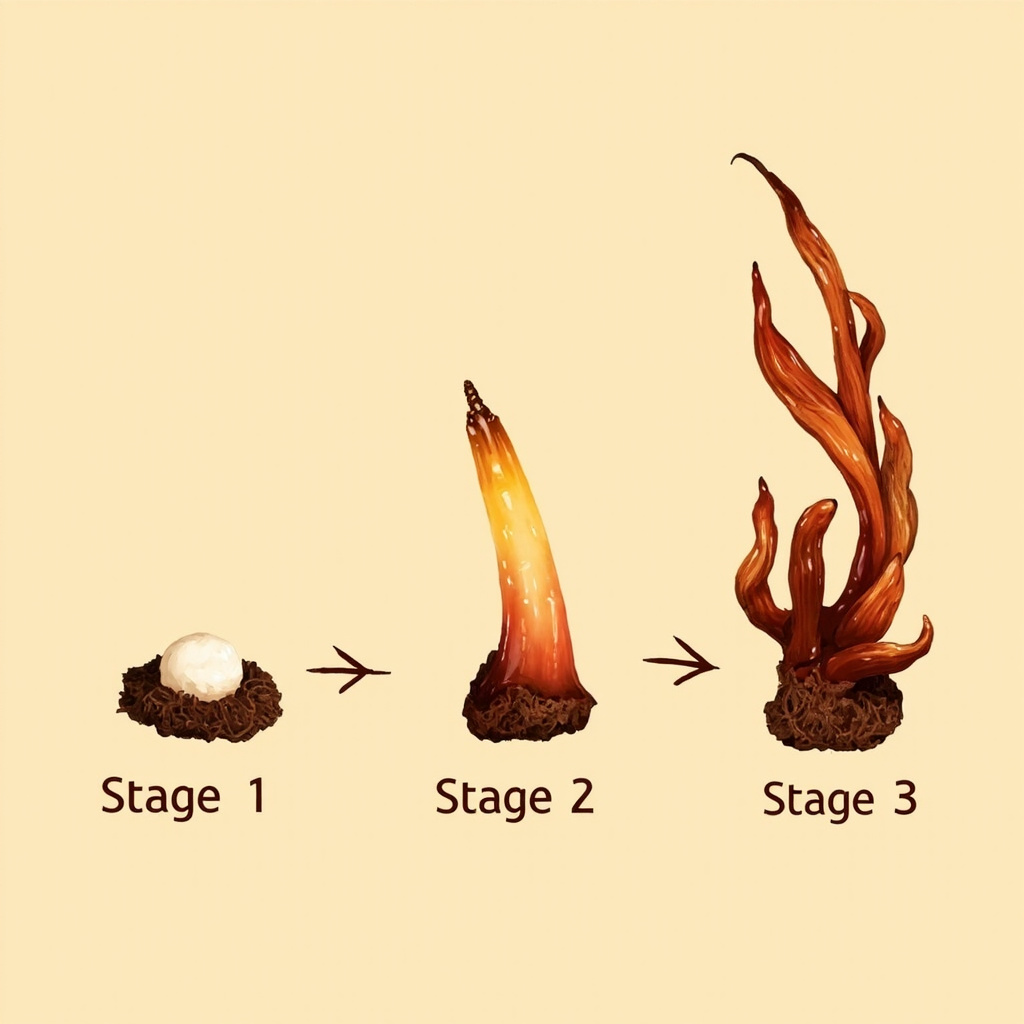
Reishi is slow. Three weeks is fast, four to five weeks is normal, six weeks is possible in cool kitchens. Watch for:
- Antler kits: small white-to-tan bumps that elongate into twisted finger-like stalks
- Conk kits: small flat growths that spread outward and gradually develop a shiny red surface
If nothing has happened by week 5, walk through the pinning problems diagnostic before discarding. Reishi blocks often look dormant for weeks and then push antlers overnight.
Path B: Bags and next level
Liquid culture plus sterilized sawdust
Reishi fruits well from supplemented hardwood sawdust bags (oak sawdust plus bran). Requires sterile technique: pressure-sterilize bags at 15 PSI for 90 minutes or longer, inoculate in still air or in front of a flow hood. The Reishi Liquid Culture Syringe is the starting culture for this path.
For outdoor log cultivation, North Spore Reishi Log Plugs offer a seasonal outdoor alternative on hardwood logs — 100 plug spawn for advanced growers with outdoor space.
Skip monotub for kitchen scale
Monotubs are bulk grain-grow setups — wrong tool for a kitchen reishi block. If your kitchen air is dry (under 40% RH), a vented humidity dome over a single fruiting block maintains the 85 to 95% RH reishi needs without the complexity of a tent or monotub. See the humidity and misting tools buyer guide for the full comparison.
Full bag workflow: grow bags after your first kit.
Conditions that matter
Reishi has specific environmental needs. Get these three variables right and the rest follows.
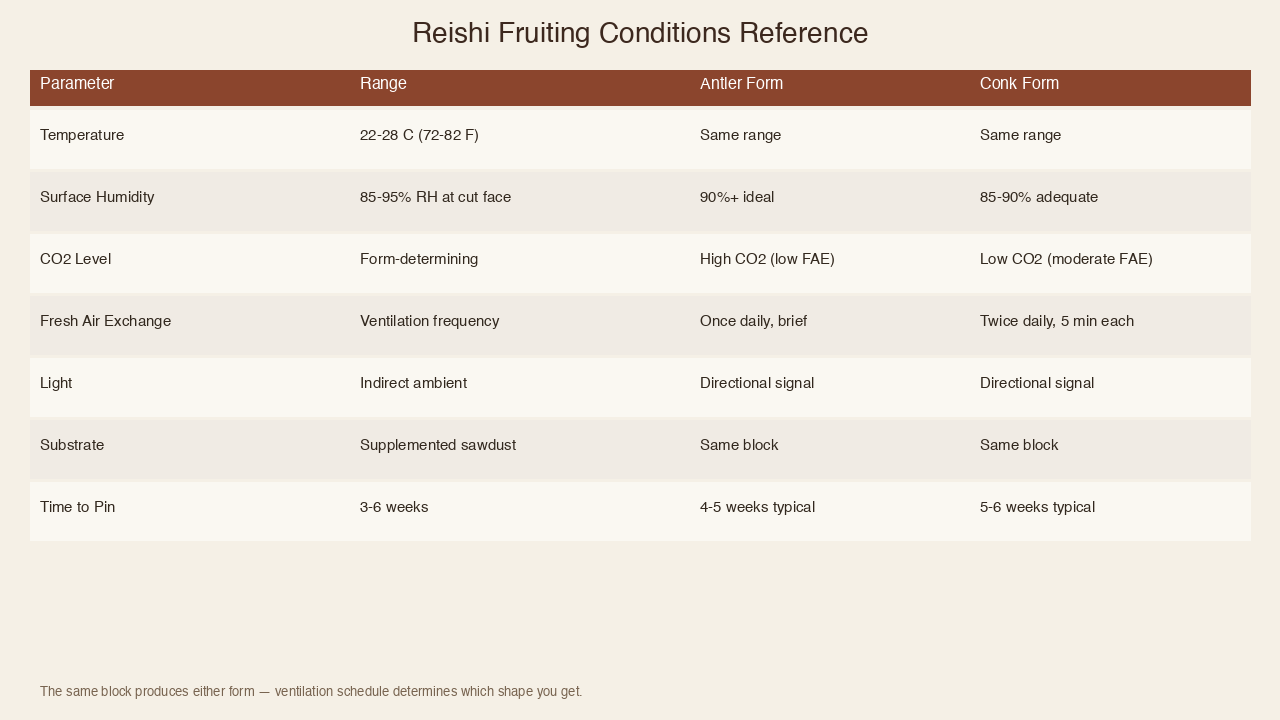
Temperature (22 to 28 degrees C / 72 to 82 degrees F)
Reishi prefers warmer temperatures than most home-grow species. Below 20 degrees C, growth stalls. Above 30 degrees C invites contamination. A typical kitchen counter stays in range most of the year — the exception is an unheated room in winter.
Surface humidity (85 to 95% RH at the cut face)
Room humidity of 40 to 60% is fine for you but not for reishi — the cut face needs 85 to 95%. The bag or dome traps moisture. Low humidity means stunted antlers or dry, cracking conk edges. In a bone-dry kitchen, a humidity dome can hold surface moisture without sitting the block in stale air.
CO2 and fresh air — the form-determining factor
This is where reishi differs from every other species on this site. The amount of fresh air exchange (FAE) determines which fruiting form you get:
- High CO2, low FAE — antler form (twisted stalks). Keep the tent mostly closed, vent once a day.
- Low CO2, moderate FAE — conk form (flat brackets). Open the tent twice a day for 5 minutes.
Decide which form you want before cutting the bag, then match your ventilation schedule to it.
Light (indirect, no direct sun)
Ambient kitchen light is enough. Reishi doesn’t photosynthesize but uses light as a directional signal for which way to grow. Direct sunlight dries the cut face and raises temperature past the safe range.
Full conditions framework: kitchen fruiting conditions.
Harvest and drying
When to harvest
Harvest when growth stops — antlers stop elongating, conks stop spreading, and the growing edge stops being white. Typically 6 to 10 weeks after pins first appeared. The mushroom will feel firm and slightly woody at this stage. Don’t wait for it to look “done” by vegetable standards — reishi keeps growing past what looks mature, and overgrown antlers curl into gnarled knots.
Slice and dry
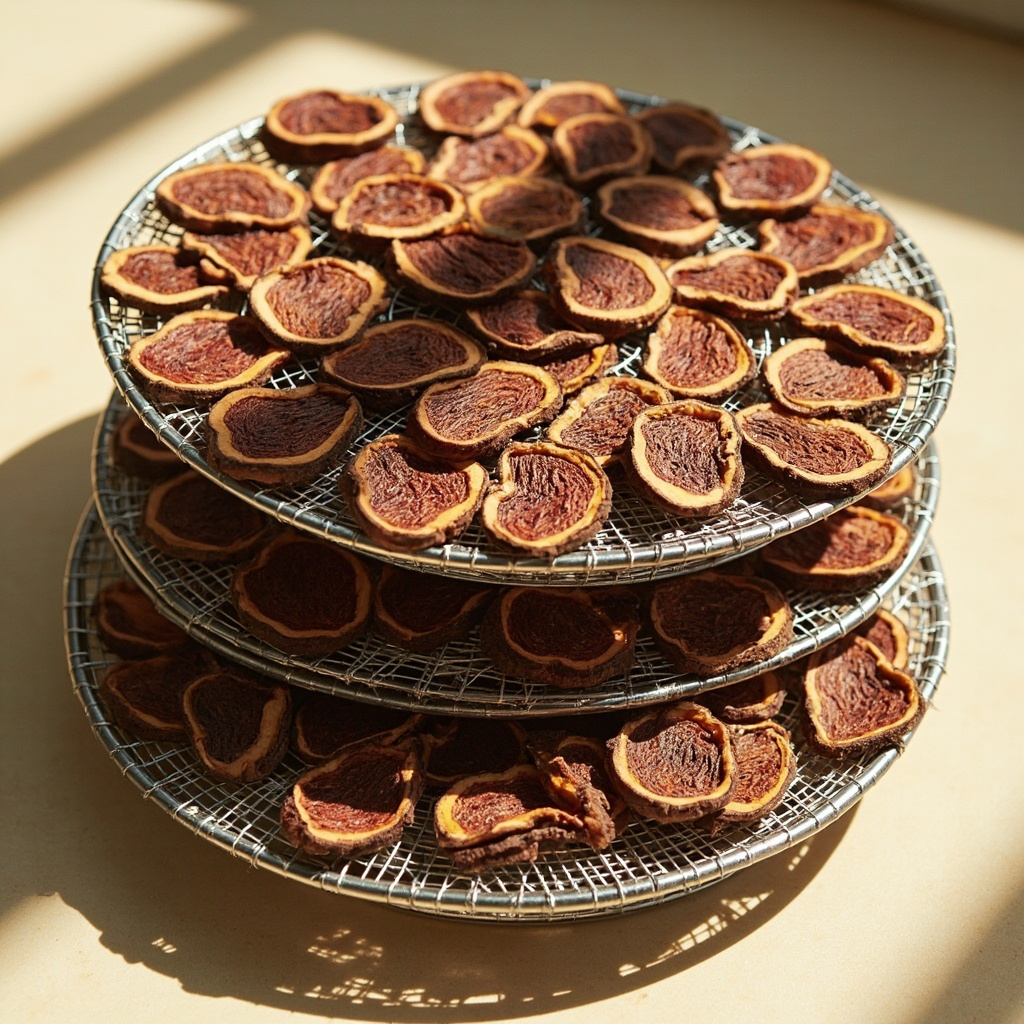
Slice fresh reishi thinly — 3 to 5 mm — while it is still slightly soft. It hardens quickly after harvest and becomes difficult to cut cleanly. Arrange slices on dehydrator trays without overlap.
Dry in a food dehydrator at 110 degrees F (43 degrees C) for 8 to 12 hours until brittle. Store dried slices in an airtight jar away from light. Properly dried reishi keeps for 12 months or longer.
Brew reishi tea
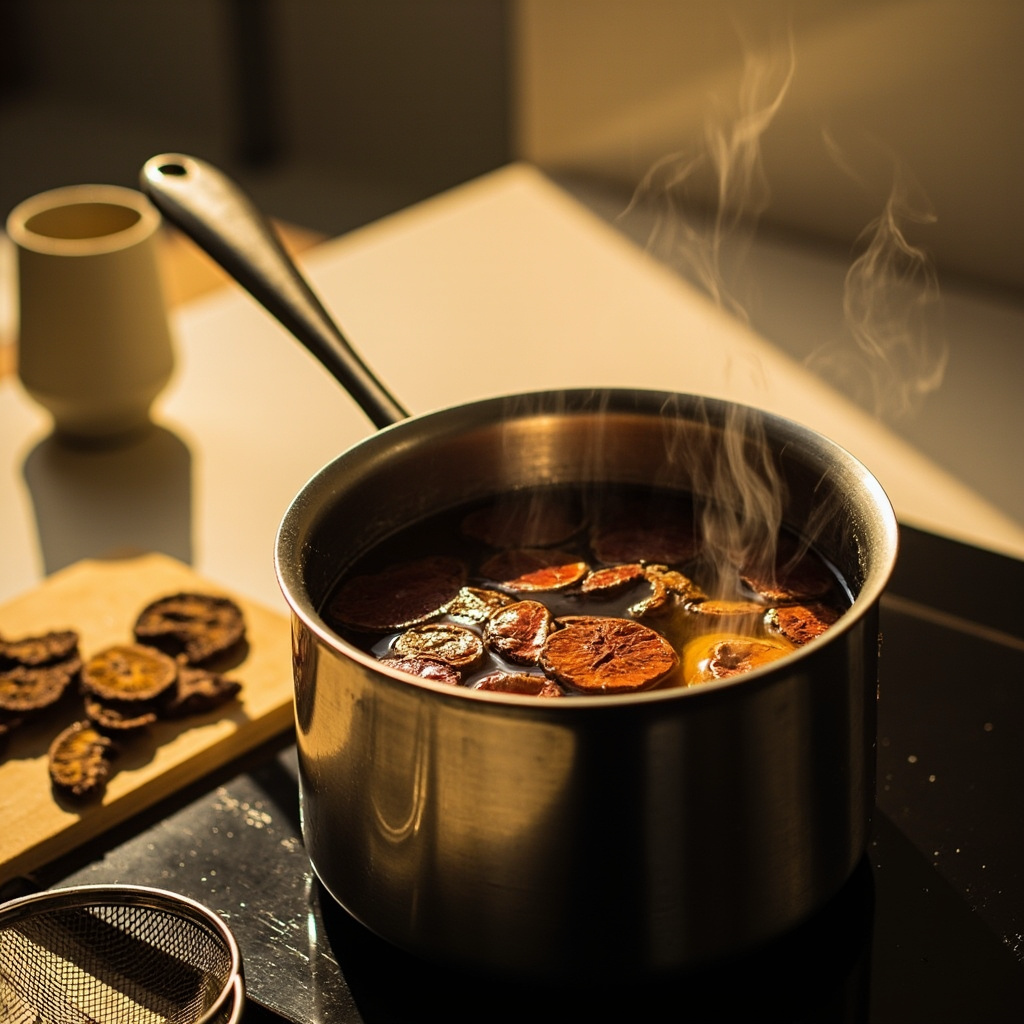
Traditional preparation: simmer 5 to 10 grams of dried reishi slices in 2 cups of water for 30 to 60 minutes. Strain the liquid. The tea is bitter and earthy — many people add honey or ginger. This is a cultural kitchen practice, not a health protocol. Reishi slices can be simmered two or three times before they lose flavor.
Common mistakes and failures
1. Expecting food, getting tea
Reishi is not oyster or shiitake — you cannot stir-fry it, saute it, or add it to soup as a vegetable. It is tough, woody, and bitter. If you want mushrooms to eat, grow a different species. Reishi is for growing, drying, and brewing.
2. Letting humidity drop during the long wait
Reishi’s 3 to 6 week pinning window is 3 to 4 times longer than oyster. Many growers stop misting at week 2, thinking the block is dead. Fix: mist daily even when nothing is visible. The cut face must stay dewy throughout the entire wait. In a dry kitchen, a vented humidity dome makes this easier — weeks of nothing, then antlers overnight, is normal reishi behavior.
3. Wrong environment for your desired form
If you want antlers but keep opening the tent for air, you will get conks — or nothing. If you want conks but keep the tent sealed, you will get antlers instead. Fix: decide which form you want before cutting the bag, then match your FAE schedule from day one.
4. Harvesting too late
Reishi keeps growing past its prime. Antlers curl into gnarled knots, conks develop spore deposits on their surface. Harvest when growth visibly stops — when the leading edge is no longer white and the mushroom feels firm and woody. Don’t wait for it to look “finished.”
5. Confusing healthy mycelium with contamination
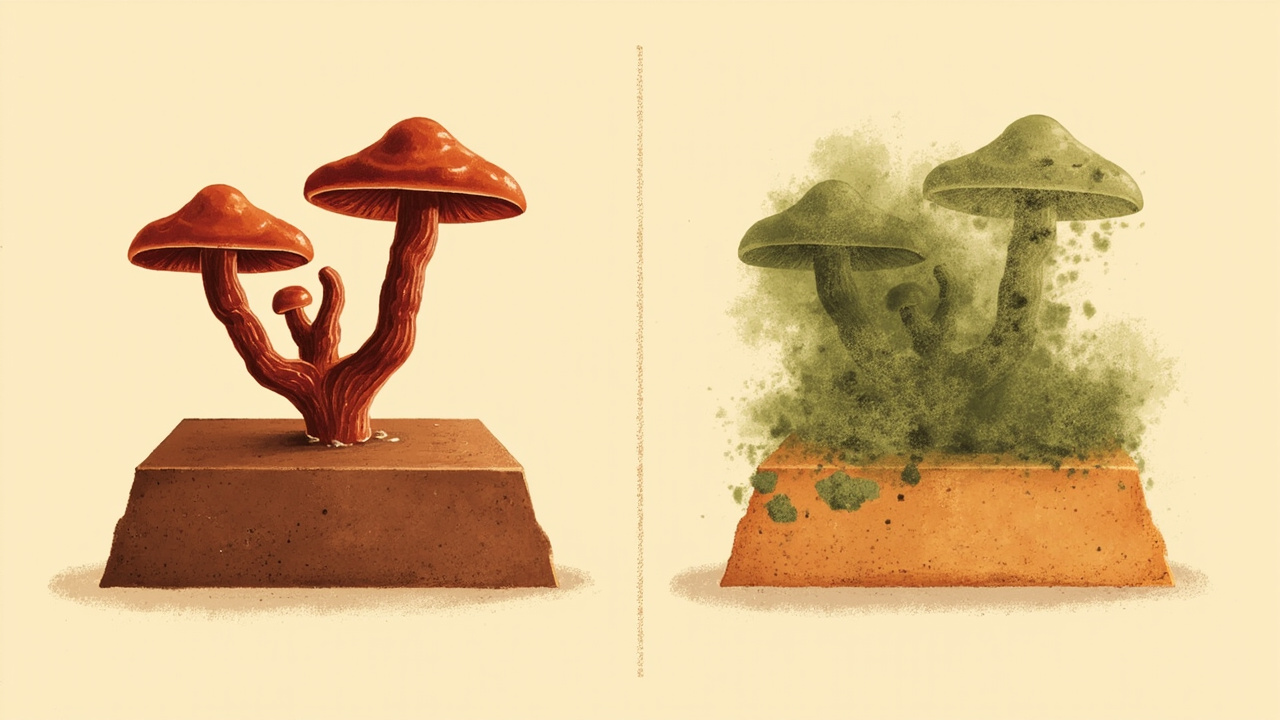
Healthy reishi mycelium is white, thick, and slightly ropey — it looks like white threads on the cut face. Trichoderma contamination is bright fuzzy green that spreads in 24 to 48 hours. Fix: isolate the block at first green sign — see the Trichoderma green mold guide.
When something looks wrong
- Green patches on cut face — Trichoderma green mold guide
- No pins after 6 weeks with correct humidity and temperature — pinning problems diagnostic
- Block smells sour or has soft sunken areas — contamination overview (bacterial)
What you’ll need
- Path A starter: a 5 to 6 lb ready-to-fruit reishi block from a specialty vendor ($29 to $35, ships colonized); the North Spore reishi log kit is the Amazon-available alternative for outdoor logs
- Outdoor log option: North Spore Reishi Log Kit — 100 plug spawn for hardwood logs
- Path B spawn: Reishi Liquid Culture Syringe — for inoculating sterilized sawdust bags
- Drying: Cosori Food Dehydrator 5 Tray — dries reishi slices at 110 degrees F for long-term tea storage
- Humidity: AC Infinity Humidity Dome — maintains 85 to 95% RH over a single block in dry kitchens
Still comparing species? See how to choose a mushroom grow kit.
Related species and next steps
- Oyster — recommended first species; fast, forgiving, actually edible
- Shiitake — slow-fruiting, cap-and-stem for eating
- Pioppino — Italian culinary profile, nutty flavor
- Lion’s mane — seafood-like texture, different shape
- King oyster — thick-stem, dense texture
Pick a sister species for your next kit based on what drew you to reishi: if you liked the visual uniqueness, try lion’s mane. If you liked the slow-food patience, try shiitake. For growers keeping culture on hand between projects, reishi spawn tolerates storage best of the six kitchen species — the same stubborn patience that makes reishi slow on the counter makes its spawn the least fussy in the fridge.
Key takeaways
- Reishi is Ganoderma lucidum — grown for cultivation hobby and traditional tea, NOT for eating
- Two fruiting forms: antler (high CO2) and conk (normal air) — same species, different environment
- Kit-first path (Path A) is the right starting route for everyone
- 3 to 6 weeks to pins is normal — the slowest common home-grow species
- Harvest when growth stops, slice thin, dehydrate at 110 degrees F, store airtight
- Brew as tea: simmer dried slices 30 to 60 minutes, strain, add honey or ginger to taste
- Strictly gourmet and cultivation framing — zero medicinal, health, or supplement claims