Problems · Green patches
Green Mold on a Gourmet Mushroom Kit — Trichoderma
“It turned green.”
Green on a kit is the classic panic moment. This guide helps you separate bruising or lighting tricks from expanding mold, then decide isolate or toss — without scraping spores around the kitchen.
Green mold on a mushroom kit: how to identify Trichoderma, rule out lookalikes, and decide keep, isolate, or discard for kits and bags.
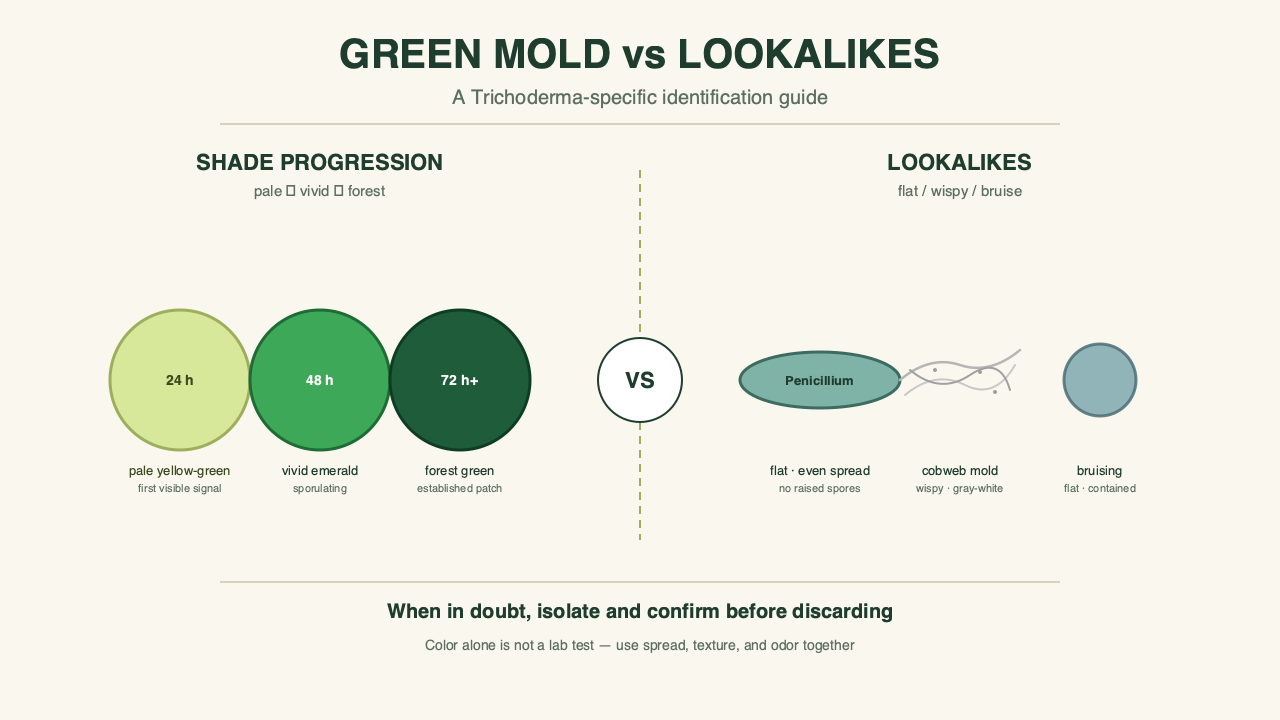
Green on a kit is the classic panic moment. This guide helps you separate bruising or lighting tricks from expanding mold, then decide isolate or toss — without scraping spores around the kitchen.
The stakes are kitchen stakes, not farm stakes. A contaminated ready-to-fruit block is a modest loss and a manageable cleanup, and almost every home grower meets one eventually. What separates a controlled loss from a contaminated kitchen is the first hour: what you touch, what you move, and whether the block stays sealed while you decide.
Trichoderma is everywhere in ordinary homes — soil, houseplants, compost, window frames — which is why “how did it get in” usually has no satisfying answer. Spores ride air currents, hands, and packaging. A kit resists them until something tips the balance: pooled water, a torn bag, a cut face left wet for days, or simply heavy mold pressure in the room.
“It turned green.”
Do this first
Isolate the kit away from other bags and food prep. Do not scrape green patches. Keep it bagged while you read. Do not open it over prep surfaces.
Concretely: move the kit onto its own plate or tray in a room without other kits, wash your hands after handling it, and leave the bag sealed. A sealed bag is your containment — everything you need to decide can be seen through it. Put a dedicated box, bin, or shelf between the kit and the rest of the kitchen for as long as this question is open, and take the tray to the trash with the kit if it comes to that.
Quick answer
Expanding green or blue-green powdery patches on substrate or fruit are often mold (commonly Trichoderma). For most kitchen ready-to-fruit kits, once green mold is established, discard the kit rather than “cut it out and hope.”
The word “established” is doing real work in that sentence. A pinhead spot seen once might be nothing; the same spot visibly larger the next day is established by any practical standard. This is why the hour-apart daylight photo comparison matters more than color matching: rate of change separates a discard decision from a wait-and-see in a way that a single glance never can.
Still unsure if it is green mold vs something else? Start at Contamination overview.
Lookalikes
Bruising on some fruits can look bluish when squeezed — usually on the mushroom tissue, not a spreading powdery colony on the block.
White mycelium is not green mold. Lighting can make wet areas look tinted — check again in daylight.
If the green spreads day over day and looks moldy, treat as contamination.
A few comparisons make the calls faster. True bruising sits where the block was pressed or scraped — under a fold, against the tray edge — and it never grows. Move your viewing angle: a bruise is inside the tissue and keeps the same outline; a mold patch sits on top of the substrate, catches light like powder, and its edge advances. Photograph the spot in daylight, wait an hour, and photograph again — the pair of frames settles most borderline calls.
Color alone still is not a diagnosis. Penn State Extension documents Trichoderma as a common green mold on mushroom beds, with Penicillium sometimes showing up as a secondary invader — two different molds, similar green, same practical answer for a kitchen kit. The question that matters is not the species; it is whether the patch is powdery, sits on the surface, and expands. Those three together mean contamination routing, whatever the exact genus turns out to be.
What about green under the surface, inside the block when you cut? That is out of scope for a ready-to-fruit kit — the kit is not sold to be opened for inspection, and an established internal colony is a discard signal in any case.
Why it happens
Opened kits compete with wild molds. Wet pooling, damaged bags, or high mold pressure in the room raise odds. Perfect sterile technique is not the kit promise — but cleanliness and not drowning the block still matter. See grow kits.
Most kitchen contamination traces back to moisture management rather than cleanliness theater. A cut face misted so heavily that water pools at the bottom of the bag creates the one condition Trichoderma loves and mushroom mycelium tolerates badly. The same applies to kits stored against a damp wall, on a windowsill with condensation, or above a sink. Dry air at the wrong extreme cracks the block and gives spores an entry point in the cracks, so both extremes feed this problem.
Room history matters too. A kitchen that recently dried a lot of mushrooms, stored potatoes, or hosted a compost bin carries more mold spores in the air than a spare bedroom. That is not a reason to grow in a sterile bubble — it is a reason to wipe the shelf, run the range hood, and give the kit the cleanest corner you have.
Keep, isolate, or discard
Isolate immediately.
If green is clear and spreading on the block: plan to discard. Bag it, take it out with trash, clean the shelf.
“Isolate” here means more than moving it a few feet. A sealed bag on a tray in a room without other kits is the working standard; a kit on the same shelf as its neighbors is not isolated, whatever the intention. Keep it there through the photo recheck and the decision, not just overnight.
Do not eat mushrooms from a heavily molded block “from the clean side” as a default kitchen rule — risk is not worth a small harvest.
If you only see tiny spots and the guide borderline cases confuse you, still isolate and prefer discard for food safety peace of mind.
Kit vs bag
Kits: one block loss is common; replace after cleaning the area. Bags: more investment — still do not vent green mold indoors. After cleanup, return to solid kit habits before scaling grow bags.
Prevention next time
Fine mist only. Keep cuts modest. Avoid stacking damp cardboard and produce next to kits. After a loss, wipe the zone and start a fresh kit — oyster is a forgiving restart: oyster guide.
Culinary / edible kitchen growing only. FungiAtHome does not cover psychedelic or actives cultivation.
Related guides
Back to problems . Affiliate disclosure . Culinary / edible kitchen growing only. [email protected]