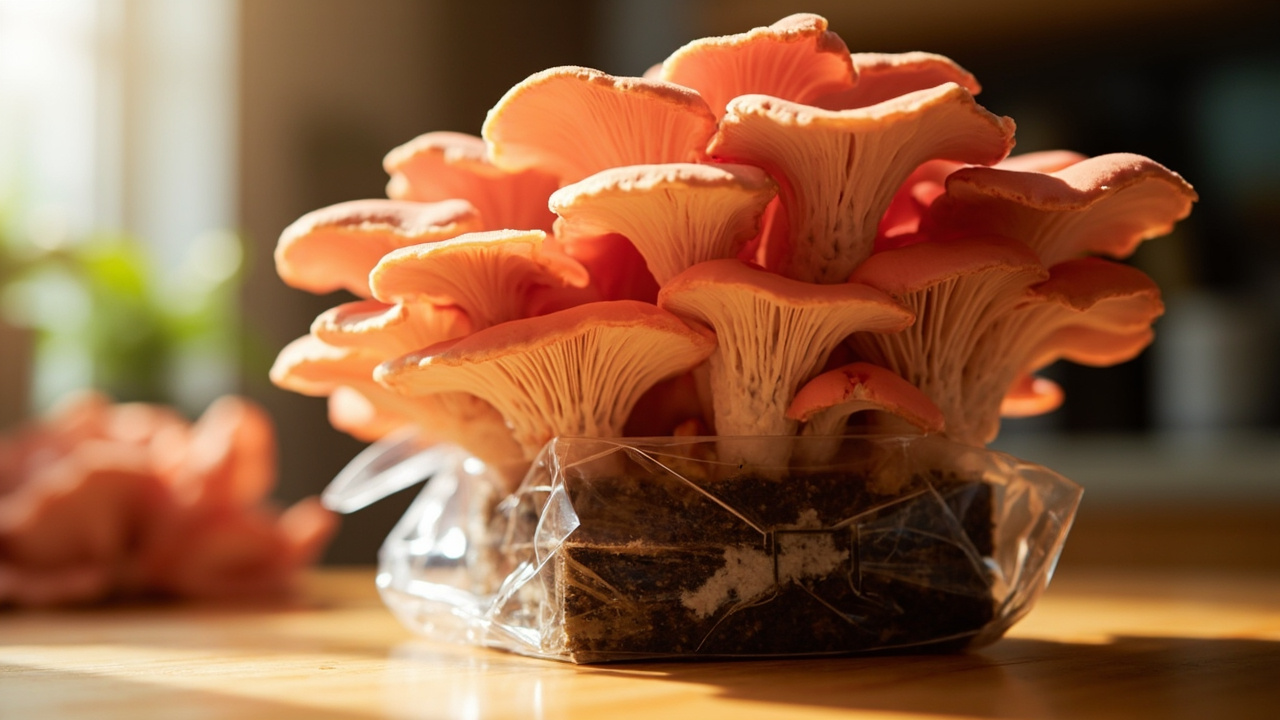
You ordered a pink oyster kit because the caps looked unreal in the photo — vivid salmon shelves clustered on a kitchen counter. Now the box is on your table and you’re wondering whether your kitchen is warm enough, how often to mist, and whether you’ll actually get mushrooms before the block dries out. Pink oyster (Pleurotus djamor) is the fastest-fruiting gourmet oyster you can grow from a kit, but it has a narrow harvest window — miss it by two days and the texture goes leathery.
Below: a kit-first, kitchen-counter guide for growing this edible species. No foraging, no health claims, no bulk-cultivation gear — just the steps from box to plate.
Quick answer
Pink oyster mushrooms grow on a kitchen counter from a ready-to-fruit kit in 7–14 days, faster than blue oyster and tolerant of warm rooms (70–85°F) that slow other species. Cut an X in the bag, mist twice daily, and harvest before the caps curl upward. They shift to orange when cooked — the firm, bacon-like texture holds up to high heat, making this edible gourmet species the pick for warm kitchens and colorful plate presentation.
What this is (and isn’t)
This is a kitchen-counter grow guide for one edible species: Pleurotus djamor, the pink oyster mushroom. It covers kit selection, the X-cut, misting, humidity, pinning, harvest, and a short cooking note.
What it isn’t:
- Not a foraging guide. Wild pink oysters exist in tropical and subtropical regions, but field identification carries risks this page doesn’t cover.
- Not a supplement or medicinal article. No health claims here. Pink oyster is a culinary ingredient — you cook and eat it.
- Not a recipe hub. One short cooking note at the end, no recipes.
- Not a psilocybin guide. Pink oyster is a gourmet, edible species sold commercially as a food crop.
If this is your very first mushroom kit, the easier default is blue oyster — it handles cooler rooms and forgives missed misting better. Come back to pink oyster after one clean harvest.
Decision tree
Branch A: Have you grown a gourmet kit before?
- Yes, one clean oyster or lion’s mane harvest — keep reading. Pink oyster is a fast, forgiving second kit.
- No, this is my first gourmet project — start with your first gourmet grow kit or the oyster species guide instead. Blue oyster is the safer training-wheels option.
- Yes, but only herb sprouters or sourdough — pink oyster works if your kitchen stays at least 70°F. Otherwise, pick blue oyster.
Branch B: Are your kitchen conditions in the species range?
- 70–85°F at the cut face, 75–90% humidity — ideal. Proceed.
- 65–70°F — still workable. Expect slower pinning, closer to 10–14 days.
- Below 65°F — wait for warmer months, or switch to blue oyster, which tolerates cooler temperatures down to 55°F.
Branch C: Why pink oyster?
- Color and shareability — vivid salmon caps that photograph well and look striking on a plate.
- Bacon-like texture when seared — firmer than blue oyster; holds structure under high heat.
- Reliable first harvest — blue oyster is still the more forgiving default. Pink rewards warm kitchens with speed.
Branch D: Monotub or Martha tent?
Skip it. Those setups are for bulk cultivation of species this site doesn’t cover. Pink oyster fruits from a Spray & Grow block on a plate — the original bag loosely tented is all the humidity control most kitchens need. If you want to scale up after a successful kit, see grow bags.
Why pink oyster fits warm kitchens
Most home kitchens run 68–75°F. That’s warm enough to slow down blue oyster but right in the sweet spot for pink oyster, which prefers 70–85°F. If your kitchen hits 75°F during summer or your heating keeps things cozy in winter, pink oyster pins faster and more reliably than any other species sold as a kit.
A Hodgins Harvest pink oyster kit is a 4 lb USDA Organic block that most growers can start with right away — fully colonized, ready to fruit the day it arrives. You cut, mist, and wait. The Forest Origins pink oyster kit is a well-reviewed backup option.
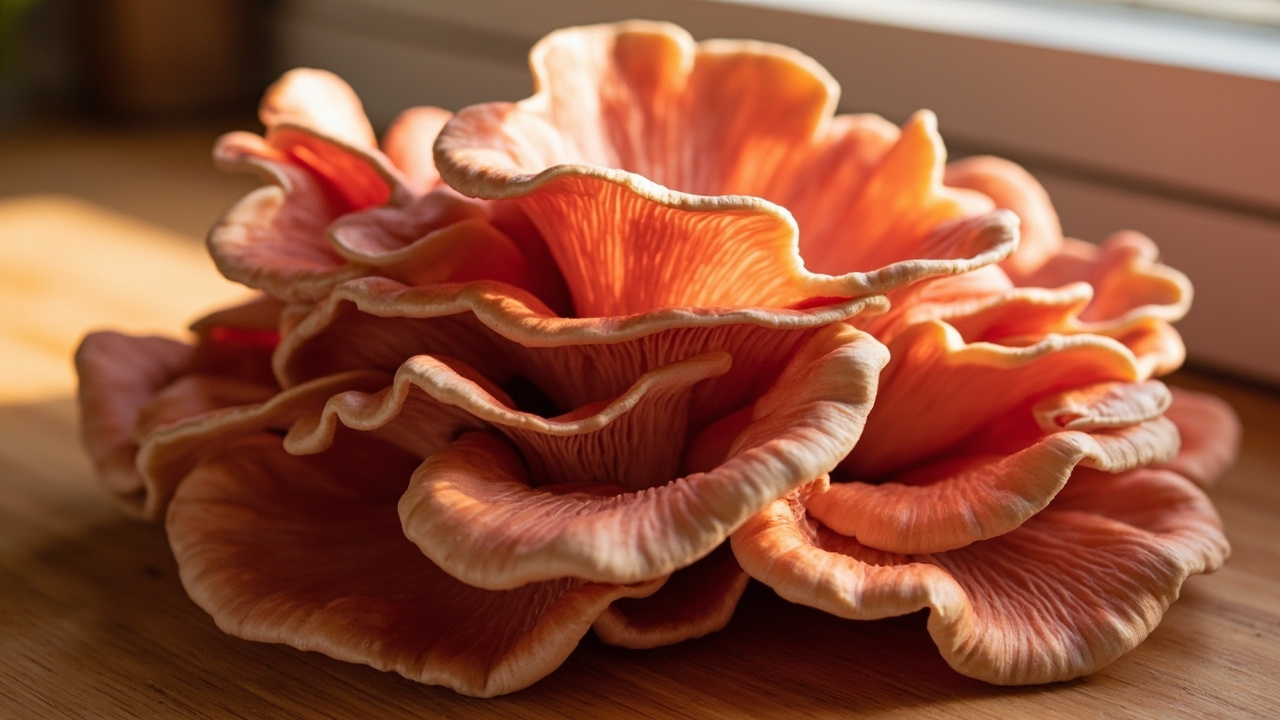
Cooking profile. Raw caps are vivid salmon-pink. Under heat, they shift to orange and golden-brown — a normal pigment change, not spoilage. The texture firms up when seared, giving a bacon-like bite that holds together in a hot pan. Blue oyster goes soft by comparison; pink stays structured.
Warm-room advantage. Blue oyster, lion’s mane, and shiitake all prefer 60–70°F. If your kitchen is naturally warm — south-facing window, second-floor apartment, summer heat — those species stall while pink oyster speeds up. This is the one species that actually benefits from a warm kitchen.
Is this right for you?
Ask yourself:
- Does my kitchen stay at or above 70°F most of the day? If not, pink oyster will struggle.
- Do I want a harvest in under two weeks? Pink oyster typically pins in 7–14 days.
- Am I willing to mist twice daily for two weeks? Non-negotiable for kit-grown mushrooms.
- Do I want colorful, firm mushrooms for cooking? Pink oyster’s texture and visual advantage.
If you answered yes to all four, pink oyster is a strong pick. If your kitchen runs cool or you want the most forgiving first experience, go with blue oyster or check our grow kit chooser. A Back to the Roots pink mini kit is a low-cost way to test whether your kitchen conditions work before committing to a full-size block.
Path A: From a grow kit (default)
1. Order the right pink oyster kit
Look for a fully colonized, ready-to-fruit block — not “spores” or “spawn.” A genuine kit arrives with white mycelium already running through the substrate. You cut, mist, and harvest; no inoculation step.
The Hodgins Harvest pink oyster kit is a 4 lb USDA Organic block that follows the standard Spray & Grow workflow. The Forest Origins Pink Oyster kit uses the same format and is the most-reviewed alternative. For a smaller commitment or a gift, the Back to the Roots Pink Mini kit is a compact option that ships with a mister and claims a 10-day harvest.
Don’t buy kits labeled as “spore kits” or “inject your own” — those ship uncolonized substrate and expect you to inoculate, which adds contamination risk and weeks of waiting.
2. Cut an X in the bag
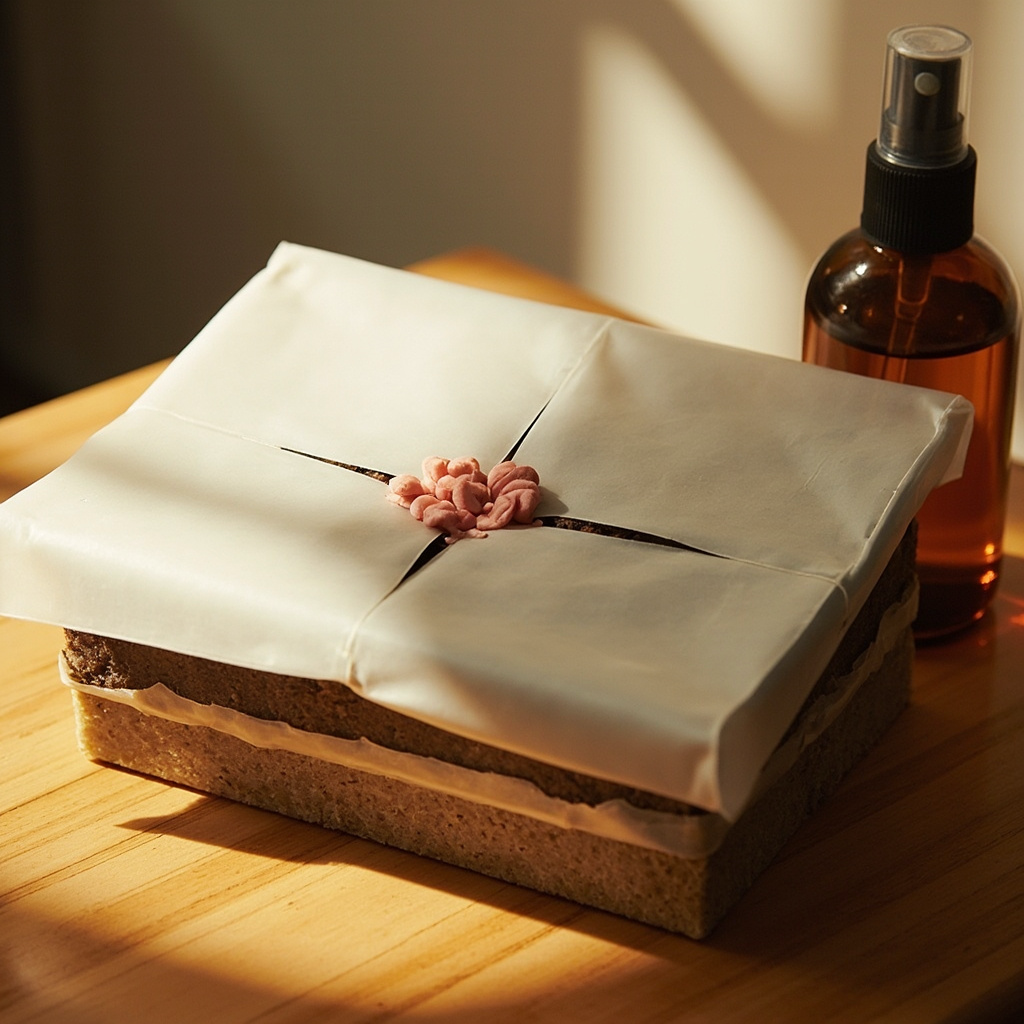
Place the block on a plate or shallow tray. With a clean knife, cut an X about 2 inches across on one face of the plastic bag. Fold back the four flaps to expose the white mycelium underneath.
Don’t unwrap the whole block. The bag is your humidity shell. Stripping it off dries the block within hours.
3. Mist twice daily
Use a fine-mist spray bottle. Give the exposed cut face 10–12 sprays, twice daily, about 12 hours apart (morning and evening). The surface should glisten like a foggy mirror — not pool, not drip.
Tap water is fine. Let it reach room temperature first — cold water straight from the tap can slow the mycelium.
4. Keep humidity high without a tent
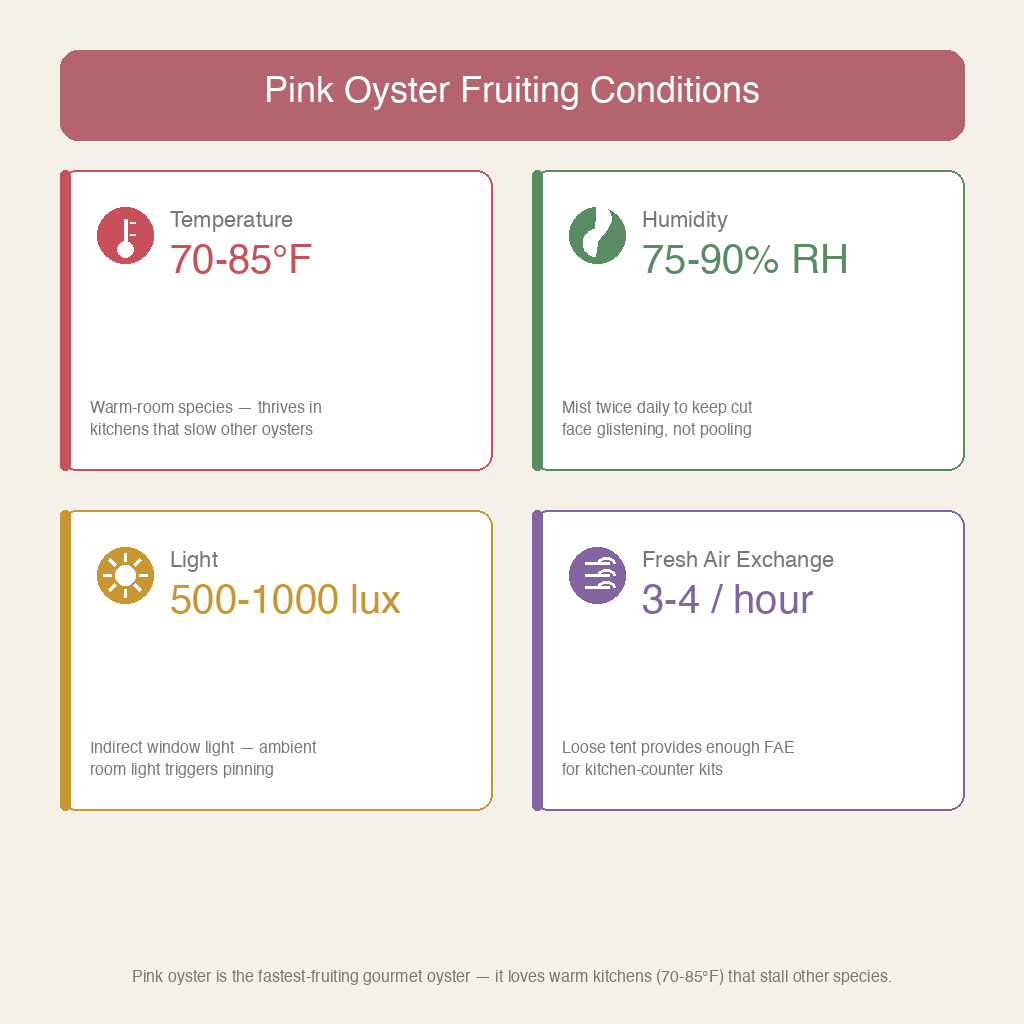
Pink oyster wants 75–90% relative humidity at the cut face. In most kitchens, the original plastic bag loosely draped over the block holds enough moisture. If your air is dry (below 40% RH — common in winter with heating), add a clear humidity tent: a loosely draped clear bag with a few vent holes, or a glass cloche. See humidity and misting tools for the full setup guide.
For genuinely dry kitchens where hand-misting can’t keep up, a 4L hose humidifier directs cool mist at the cut face and sustains the 75–90% RH range without converting a bucket. Overkill for most first-time growers, but practical if you live in an arid climate.
5. Wait for pins (7–14 days)
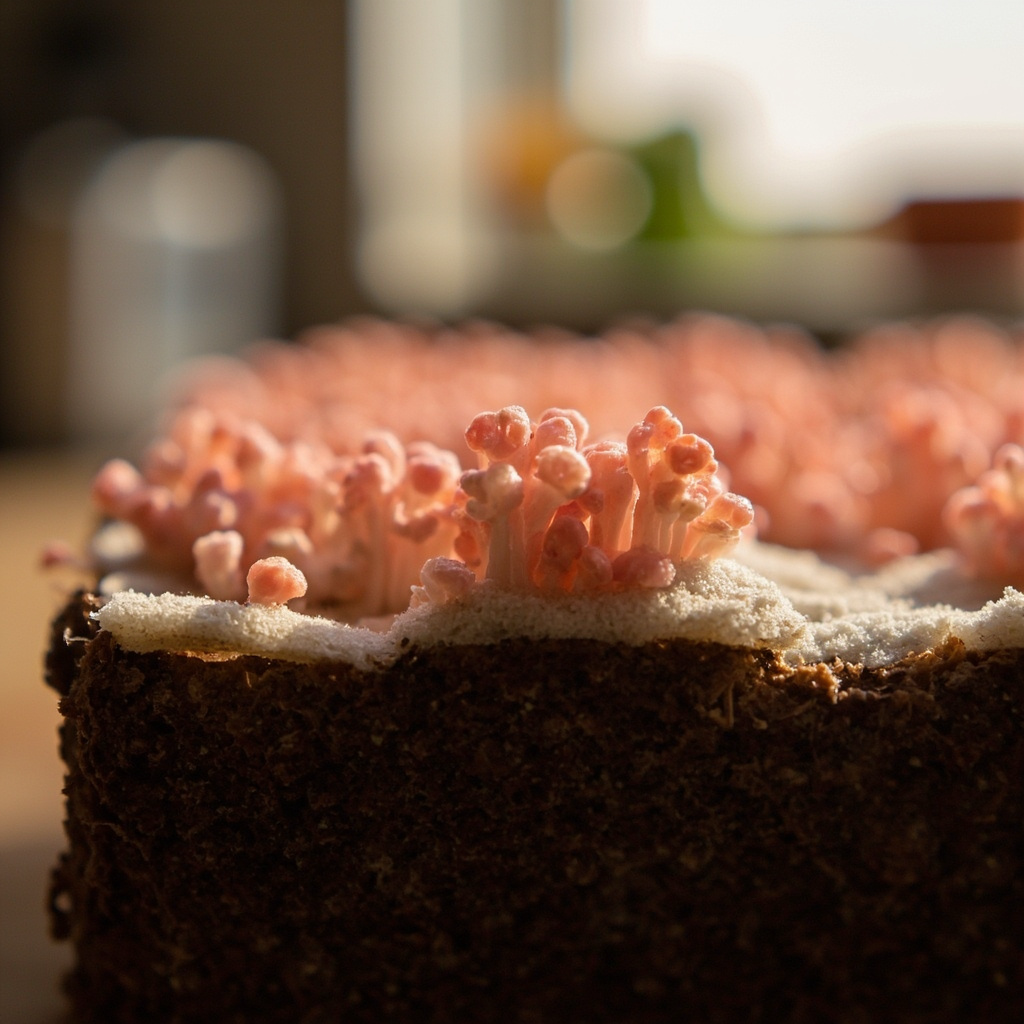
Pink oyster pins faster than blue oyster. First pins appear as tiny coral-pink beads clustering at the cut edge, usually within 7–14 days. They grow fast once they start — caps can double in size daily.
If 21 days pass with no pins, something is off. Check temperature (is it below 65°F?) and humidity (is the cut face bone-dry between mistings?). See pinning problems for the full troubleshooting decision tree.
6. Watch for contamination
White, fluffy growth is healthy mycelium. Green, black, or wet-smelling patches signal contamination — the most common is green mold (Trichoderma). If you see green, don’t scrape it and hope. Isolate the block and check the contamination overview for keep-vs-toss decisions.
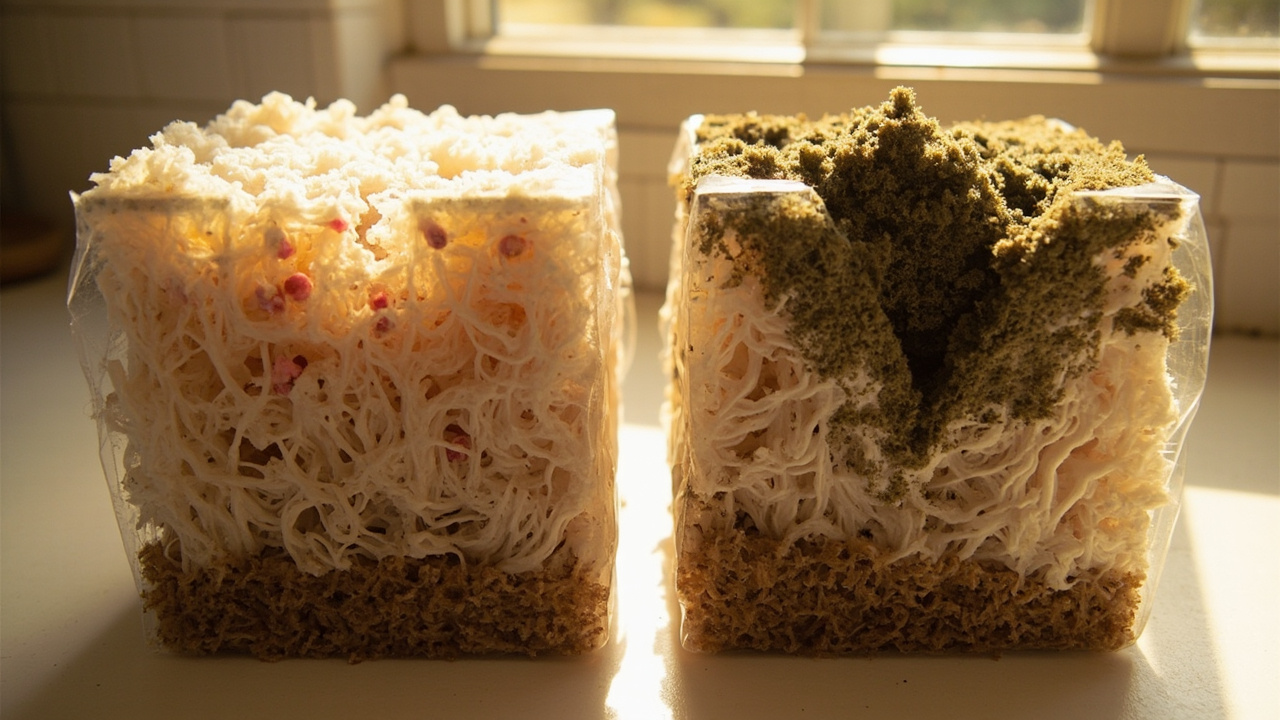
Pink oyster caps are supposed to be pink. Pink fuzz growing on the substrate rather than forming shelf-like caps could be a different organism — when in doubt, photograph it and compare against the contamination guide.
7. Harvest before caps curl upward
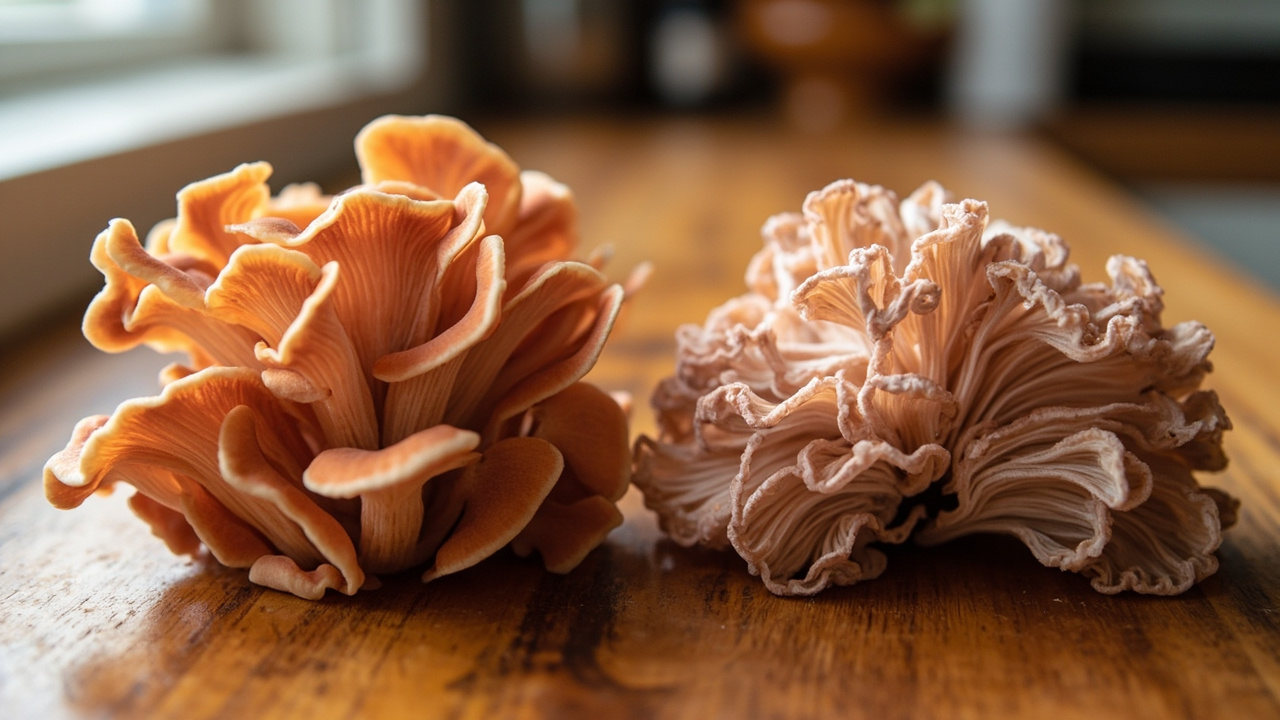
The harvest window is narrow. Pick when caps are flat to slightly curved, vivid salmon-pink, with edges still curled slightly downward. Once edges curl strongly upward and the color fades to pale pink or white, the mushroom is over-mature — texture turns leathery and the caps release spores that dust everything nearby.
To harvest: twist and pull the entire cluster from the cut face in one motion. Don’t cut with a knife — leaving stem tissue behind invites contamination. A 4 lb kit typically yields 0.5–1.5 lb on the first flush.
For the full Spray & Grow workflow across all species, see how grow kits work.
Harvest and second flush
Second flush
After the first harvest, the block can fruit again. Soak it in filtered water for 4–8 hours (fully submerged), drain, and return to your misting cycle. The second flush is usually smaller — expect 0.25–0.75 lb — but often arrives faster than the first.
When to stop
After two flushes, the block is spent. Compost it or use it as garden mulch. Don’t chase a third flush indoors — the block is exhausted and contamination risk climbs fast.
Common mistakes
- Using blue oyster timing for pink oyster. Pink runs warmer (70–85°F) and pins faster (7–14 days). If you follow a blue oyster guide’s harvest schedule, you’ll pick too late. A Forest Origins pink oyster kit ships with species-specific instructions — read those, not generic oyster guides.
- Unwrapping the whole block. The bag is the humidity shell. Removing it dries the block within 24 hours. Cut an X only.
- Letting the cut face dry out. Caps brown, abort, or fail to pin. The surface must stay dewy between mistings. In dry kitchens, a 4L hose humidifier is the reliable fix when hand-misting isn’t enough.
- Harvesting too late. Caps curl upward, color fades, texture goes leathery. Harvest when caps are flat and vivid salmon-pink — check daily once pins appear, because pink oyster doubles in size fast.
- Importing bulk-cultivation techniques. Monotubs, SGFCs, and Martha tents are for bulk grows of species this site doesn’t cover. For kitchen kits, the original bag loosely tented is sufficient. See grow kits for the standard workflow.
Path B: Bags and next level
After one successful pink oyster kit, you can move to inoculating your own substrate bags for 2–3x the yield per block. Pink oyster grain spawn arrives fully colonized and ready to mix with pasteurized straw or hardwood pellets in filter bags.
This is intermediate-level work — sterilization matters, and contamination risk runs higher than with ready-to-fruit kits. Don’t start here. Get a clean harvest from a Hodgins Harvest pink oyster kit first, then upgrade.
For the full bag-based workflow, see grow bags.
Cook your harvest
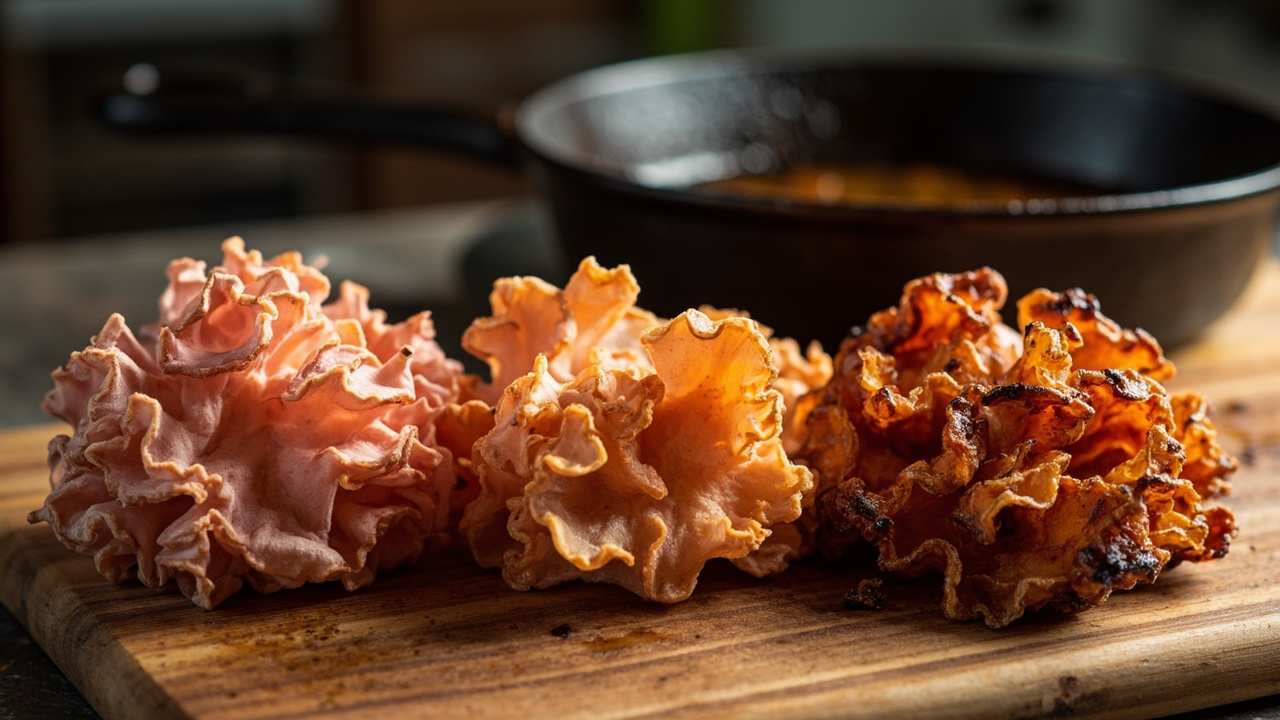
Pink oysters shift from vivid salmon to golden-orange under heat — this is normal, not spoilage. Tear the caps into strips and sear them hot in a dry pan, 2–3 minutes per side, until edges crisp. The texture firms up and takes on a bacon-like bite. Skip steaming or boiling — the caps go soft and lose their structure.
Related species
- Blue oyster — the default first kit; cooler rooms, softer texture
- King oyster (Pleurotus eryngii) — thick trumpet stem, firmer bite, cooler conditions
- Lion’s mane — different genus, same kit workflow, crab-like texture
Key takeaways
- Pink oyster is the warmest-fruiting gourmet kit species — it thrives in kitchens running 70–85°F
- Cut an X, mist twice daily (10–12 sprays), keep the cut face dewy — don’t unwrap the block
- First pins appear in 7–14 days; harvest when caps are flat and vivid salmon-pink, before edges curl upward
- Expect 0.5–1.5 lb first flush; a second flush is possible after rehydration
- This is a culinary species only — no health claims, no foraging, no bulk-cultivation gear needed